Friday, September 9, 2016
Wednesday, September 7, 2016
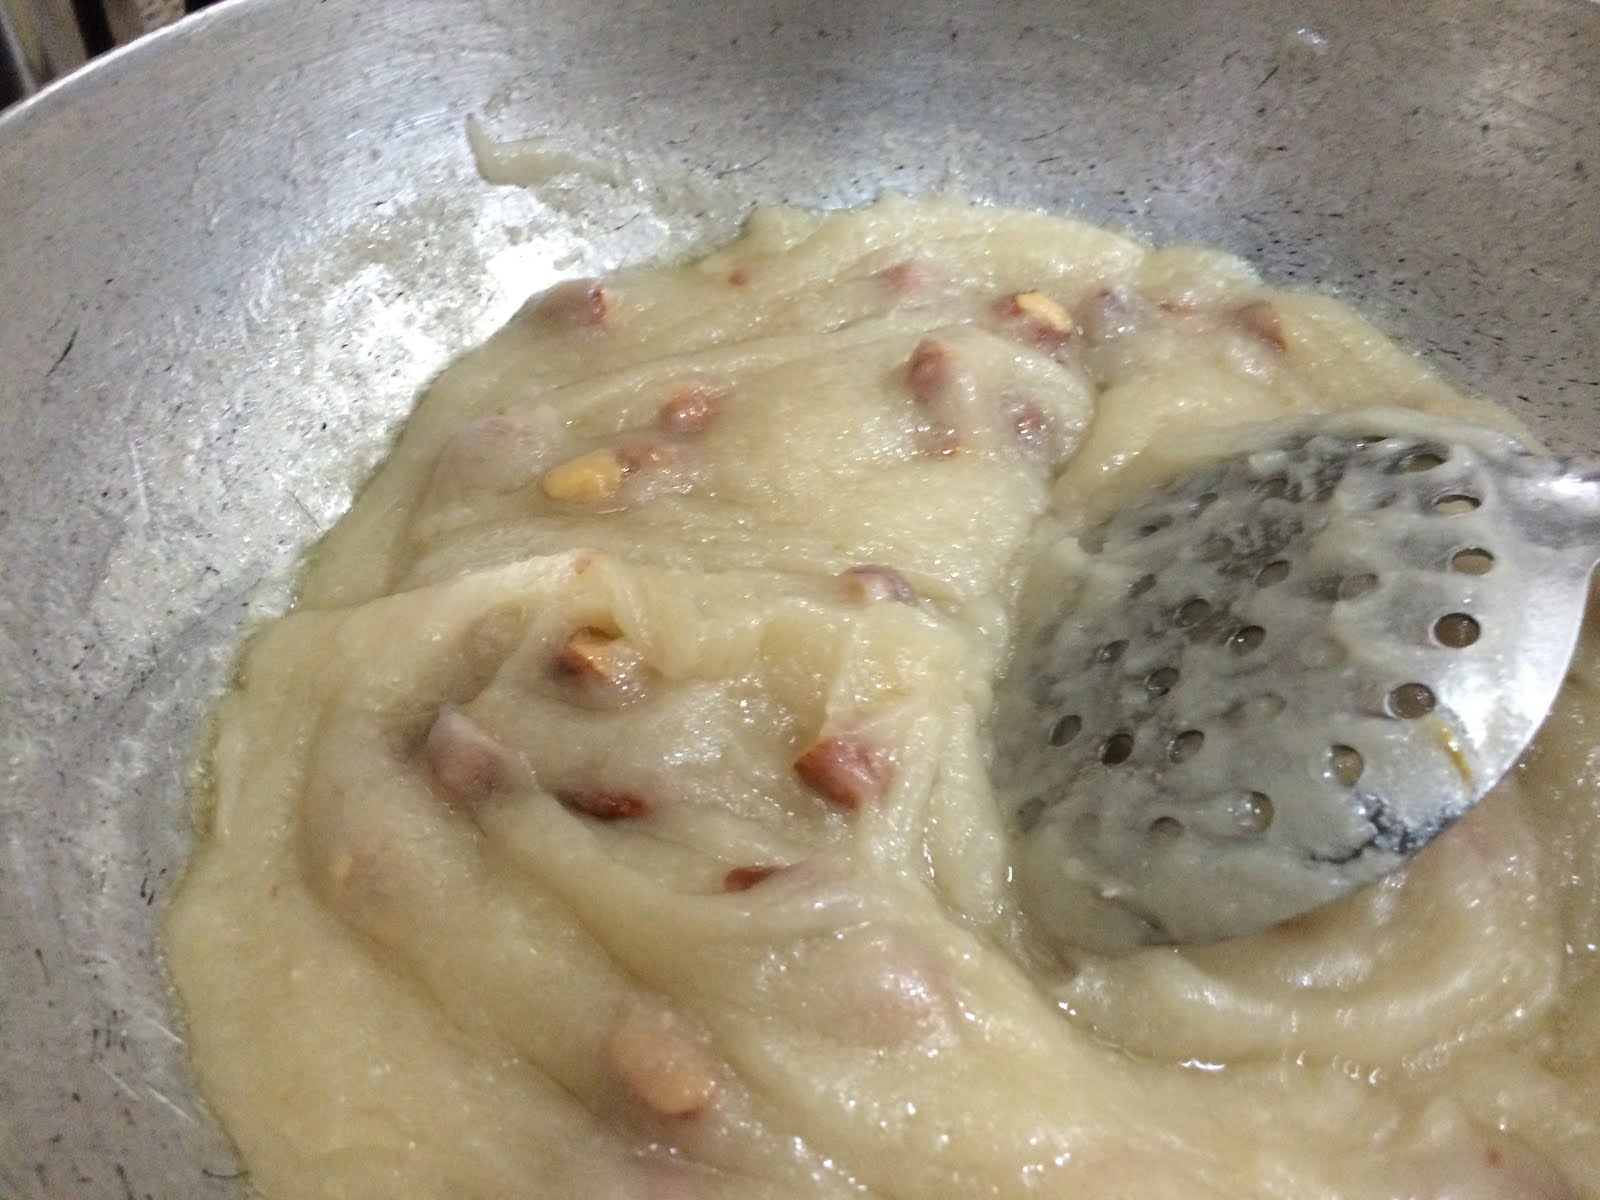
Naturally Gluten Free - Rice Halwa

The recipe below would serve about 6 to 8 people.
Depending upon whether you are using regular rice flour or roasted rice flour, kindly follow the table below detailing the ingredients and their measures.
INGREDIENTS : Regular Rice Flour

INGREDIENTS : Roasted Rice Flour

METHOD
- Take a heavy bottom kadai on slow to medium flame
- Add Ghee to the kadai and let it become warm to medium hot, NOT hot.
- Add your selection of nuts and let them fry a bit . They should not change color.
- Add the rice flour and start stirring it slowly but continuously to ensure uniform browning of the rice flour. Continue till the color changes to very light golden brown.
- While you are doing this keep the water for boiling on the stove or an electric kettle. I find using kettle a better option as the water along with some rice flour would splatter once the boiling water is added.
- The step #3 could take about 20 minutes or so if using regular rice flour and 5 minutes or so if using roasted rice flour. Slow browning is the key to a satiating halwa.
- Once the rice powder has been evenly browned well, add sugar followed by the boiling water to be added slowly .

- Be careful at this stage as to not burn yourself. Now bring the flame to high and as you add water slowly, continue to stir harder using a cooking spoon with long handle.
- Once all water has been added, continue to stir without stopping (else there could be hard rice balls which don't get mixed up well.
- Continue till ghee starts separating and halwa leaves the sides of kadai.
Best eaten with GF yummy Puris
___________________________________
All views, opinions and suggestions in this blog are as per my own personal experience or learning . I am not a medical doctor and none of these should be taken as a medical advice. Kindly check with your medical doctor before you try any of the suggestions in these posts.
All views, opinions and suggestions in this blog are as per my own personal experience or learning . I am not a medical doctor and none of these should be taken as a medical advice. Kindly check with your medical doctor before you try any of the suggestions in these posts.
Monday, September 5, 2016
Make your own GF Baking Flour blend
Which Gluten Free Flour is the best for baking?
All (well ,almost) GF baking flour blends, available in the
market use additives, gums,husks,milk powder and so on… to be able to give you the
“Gluten” effect in your GF baking. They do give the right texture and taste, you want
to achieve ,but at the cost of your health.
Take Charge of your health!
Make your own GF baking flour!

Sharing with you, the ideal structure of GF baking flour blend and how you can make it yourself, depending upon the ingredients available to you and suitable for your health.

Within each Ingredient Family, you could have your own combination of flours mentioned above. For example, there was a time when I realized my son had problems with any fiber other than coconut. So I made my own blend consisting of : White rice flour (60%) , Coconut flour (10%) , Tapioca(20%), Potato starch (10%).
So go ahead,wear your thinking hat and experiment in your lab , kitchen that is :). Make a blend that goes best for your own and your families' requirements in terms of taste, texture and health.
For most Celiacs and Gluten sensitive population fiber is not a friend and hence is best avoided. Fiber by definition is roughage and for already damaged intestines, roughage is too rough , too scraping . That is the reason I do not include these fibrous flours in my GF Baking Flour Blend. You may or may not do so as per the signs your body gives you .
For more about my GF Baking Flour Blend and recipes for making cakes , breads and cookies click on the specific recipe link on the right side of the blog.
Hope you all have a wonderful time experimenting and making your own GF Baking flour blend . Please feel free to ask any queries that you may have. . See you again with another healthy recipe for your GF family.God Bless !
_________________________________________
All views, opinions and suggestions in this blog are as per my own personal experience or learning . I am not a medical doctor and none of these should be taken as a medical advice. Kindly check with your medical doctor before you try any of the suggestions in these posts.

All views, opinions and suggestions in this blog are as per my own personal experience or learning . I am not a medical doctor and none of these should be taken as a medical advice. Kindly check with your medical doctor before you try any of the suggestions in these posts.

Sunday, September 4, 2016
GF Healthy Rice Ghee cookies

As in most of my posts, I like to remind my GF friends that Gluten Free is not equal to Healthy. In fact most (if not all )GF foods in the market today , whether they are ready to eat or cook or bake, if they are not naturally gluten free , are not healthy at all.In fact they are unhealthy and could even be harmful to our already sensitive systems. And anybody who is managing a difficult life without gluten is doing so for the purpose of letting their bodies heal of the damage already done.
In this series of making healthy addition to children's regular snacking, I set out for a cookie which can be had with milk.
After all, a big cookie with milk makes a complete breakfast. As per our Ayurveda combinations ,milk should not be had with anything salty , anything fermented, or anything with any kind of a leavening or rising agent, natural or otherwise .
So effectively the following combinations will be the first to be thrown out of the window:
- Parantha/puri with milk
- Salty and milk ? bad idea !Now we know why our grand parents and great grand parents always had paranthas with curd , with butter, with buttermilk but not with milk. Puri with lassi or chai, samosa/mathri/kachori with chai.
- Idly/dosa/khaman/Dhokla/untoasted bread/cake/cookie made with soda or baking powder with milk
- Fermented food and milk ? Another bad idea ! Now we know why Britishers had their bread always toasted for breakfast with milk. Sandwiches are fine when there is no milk in the menu.We did adopt their breads in our daily lives without understanding how to consume and in what combinations.
While I was looking for something to complement milk and make my son's breakfast complete, first came the GF Butter cashew cookies . While they were perfect in their own way, I still wanted something which was a little less fragile, less buttery and more crunchy and something that could be dipped in milk /chai without breaking off immediately .
Since wanted these cookies to be consumed on a regular basis , didn't want to use any starches whatsoever, not even the tapioca and/or potato starch. So I was left with only Rice Flour and Millet flour.
Now, Millet is a very difficult subject ,after all. If I say here, that millets are not good for anyone who needs a gluten free diet, most mothers/individuals will look at me with denial and suspicion regards my good intentions , or If I may say , lack of them. We all believe Millets are very healthy. Must be . But just like most of us believed that whole wheat flour was very healthy till we were told that they are our biggest enemies, Millets are very abrasive for anybody whose intestines, nerves, glands are not in the best condition.
The only grain which is safest to consume in any ailment is the ubiquitous white rice (Best being old basmati rice). And I took years to learn this. But once I did, there was no looking back and our episodes of unexplained illnesses also reduced dramatically.
The ingredients finally I was comfortable with were sugar , rice flour , ghee, Spices as per your taste and as per the season. You could use Vanilla, cardamom,nutmeg , cinnamon and many others. Some spices taste well as a stand alone while some others go well in combinations. Feel free to make a selection depending upon your own taste and requirement.
Here I share with you ,a recipe to make cookies with these very basic ingredients without any starches /gums/additives/raising agents.
INGREDIENTS:
METHOD:

Enjoy your chai and biscuit ... hope you all have a wonderful time making and eating these cookies . Please feel free to ask any queries that you may have. Bye for now . See you again with another healthy recipe for your GF family.God Bless ! _____________________________________________
All views, opinions and suggestions in this blog are as per my own personal experience or learning . I am not a medical doctor and none of these should be taken as a medical advice. Kindly check with your medical doctor before you try any of the suggestions in these posts.
Here I share with you ,a recipe to make cookies with these very basic ingredients without any starches /gums/additives/raising agents.
INGREDIENTS:
Measure
|
Weight
|
|
1+2/3 cups
|
260 gms
|
|
Sugar powdered
|
½ cup(before powdering)
|
105 gms
|
Ghee
|
½ cup in molten state
|
96 gms
|
Milk
|
4 tbspn cold ( or more )
|
|
Spice 1-Elaichi powder
|
Two pinches
|
|
Spice 2-Nutmeg powder
|
3 pinches
|
METHOD:
- Preheat your oven to 160 degrees C .
- Measure/weigh all the ingredients. Ghee needs to be in molten state for the cup measure.
- Mix all the dry ingredients.
- Add cold ghee - using your finger tips rub the ghee with speed with the dry ingredients such that it start coming together before the ghee actually melts completely. It will still be crumbly and may not come together even in a rough ball.
- Now add cold milk , one TBSPN at a time and using your finger tips very gently get the ingredients together to form a ball which is not too soft. It should be soft enough to make a ball using both the palms . A firm ball that is .
- At this stage the dough does become a bit soft due to the warmth of our hands touching it again and again. To get a firm dough, you could keep it well covered (airtight) in the refrigerator for about 20 minutes or so. It's ok to skip this step in cold weather.
- Roll the dough into small balls gently with your palms. You could just keep the ball as it is for baking or could flatten it a bit. completely your choice. It will change the look and the bite a bit. Nothing will change in the taste.
- Line your baking tray or you could use a cookie tray , as you please. These cookies don't spread so there is not much to worry.
- Bake them in the middle rack for about 20 to 25 minutes. The timings could vary depending upon your specific oven .
- After about 10 minutes of being in the oven, use a fork to press the cooker in the middle and slowly drag the fork pulling it towards yourself.
- Continue to bake till the time the color changes slightly , very slightly. Like golden brown.
- It's best to let the cookies cool down a bit before taking them out . However I end up taking out at least one piece immediately to taste. These cookies don't break easily. They are the best to be dipped in milk or chai .:)
- I baked my first batch for about 25 minutes and let the next batch brown a bit more , for about 35 minutes in total. The batch 1( light colored ,ones right in the front in the picture below) were very flavorful (of the spice ) and had just the right crunch. The batch 2 (the ones which are darker in color and are behind the batch 1 in the picture) were more crunchy , had a bit of caramelized taste and rendered less flavor of the spices added. You could make your own choice and decide which ones you like more .

Enjoy your chai and biscuit ... hope you all have a wonderful time making and eating these cookies . Please feel free to ask any queries that you may have. Bye for now . See you again with another healthy recipe for your GF family.God Bless ! _____________________________________________
All views, opinions and suggestions in this blog are as per my own personal experience or learning . I am not a medical doctor and none of these should be taken as a medical advice. Kindly check with your medical doctor before you try any of the suggestions in these posts.
Subscribe to:
Posts (Atom)